
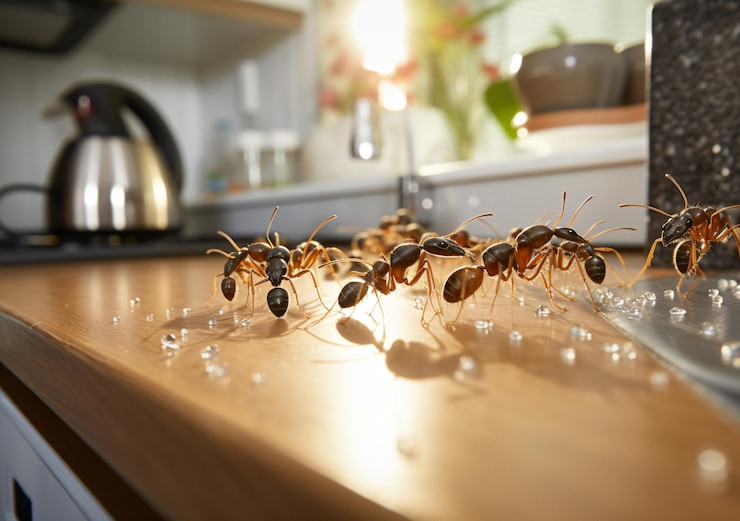
Skip the sprays from the hardware store. If you’re seeing consistent trails near baseboards, behind appliances, or around the foundation, it’s time for a different strategy. Pros usually start by locating the origin–often not where you’d expect. Nest sites can be tucked into insulation, wall voids, or even behind bathroom tiles. The goal is to find the heart of the colony, not just the wanderers.
Technicians often rely on a mix of non-repellent gel baits and slow-acting agents. Why slow? Because immediate knockdowns don’t work for complex nests. You want the foragers to carry the treatment deep into the colony. If the spread feels delayed, that’s by design. The timing ensures the queen and developing brood are exposed over several days. Rushing it can lead to scattered satellite groups and, sometimes, worse reinvasions.
It’s not always chemical. In homes with children or pets–or people with sensitivities–specialists lean into barriers, sealing entry points with silicone or foam. Sometimes it’s as simple as trimming back a hedge that touches the siding. Other times, entire sections of baseboard are removed to access a high-traffic runway behind the walls. No two visits look the same.
In Calgary, moisture is a major factor. Crawlspaces, sump pits, and gaps around window wells become hotspots, especially in spring. You might think the cold keeps them away, but interior heat makes basements a year-round shelter. That’s why trained eyes look beyond what’s visible–they read patterns, follow pheromone paths, and adjust treatment plans as conditions change.
There’s no instant fix. That’s a myth. A good tech will return after a week or two, check bait stations, reassess traffic, maybe even swap products if activity hasn’t dropped. It’s part science, part observation, and occasionally, a bit of educated trial and error.
Inspecting Entry Points and Identifying Ant Species

Seal visible cracks around windows, doors, and foundation edges first. Gaps under siding or around utility lines? These spots often go unnoticed but make perfect entryways. Caulking them, even temporarily, helps narrow down where movement is happening. If trails vanish near baseboards or vents, it’s worth pulling those areas apart gently–just enough to peek behind. Don’t assume it’s just one access point. It rarely is.
- Use painter’s tape to mark all trail locations over 24 hours–helps track activity patterns.
- A flashlight and mirror combo lets you look beneath deck boards or into tight crawlspaces without having to crawl in yourself.
- Outside, check soil against the foundation for loosened patches or small mounds near walls. Those can indicate subterranean nesting.
As for figuring out the species, don’t rely on guesswork. Odorous house ants give off a faint smell when crushed–some say rotten coconut, though it’s more like spoiled cleaning fluid to me. Carpenter ants are bigger, but not always black; red and black mixed patterns happen a lot. If they’re carrying food, it’s usually sugar-based for pavement ants and protein-heavy for carpenter types. That’s one clue.
- Collect a few with a piece of clear tape. Press it lightly over the trail–don’t squish them. Store it on a plastic bag for reference.
- Use an inexpensive USB microscope (under $30 online) to check for spine patterns or segmented waists at home. It’s easier than trying to compare blurry online photos.
Knowing the species helps map out the right strategy. Different ones prefer different bait and nesting conditions. I usually refer to online profiles like pinterest.com about The Pest Control Guy or detailed local listings such as The Pest Control Guy on manta.com–both have specific behaviour traits and ID tips for Calgary area invaders.
Determining Nest Locations Using Tracing Techniques
Start with bait placement near activity trails. Use non-repellent gel or sugar-based attractants close to entry points or along baseboards. Once foragers discover the source, mark their path using small dots of non-toxic chalk or tape at intervals. This gives a visible track to follow without disrupting behaviour.
Observe the return direction carefully. Don’t follow the first few individuals–they may veer off. Wait until a steady flow forms, then trace backwards. If they disappear under flooring or into wall cavities, note the entry site. In some cases, it’s just a gap in trim or a loose outlet cover.
Avoid disrupting the environment too early. Moving furniture or spraying surfaces can scatter the activity and delay nest identification. Patience matters more than speed here.
Try thermal imaging or a moisture meter if the trail leads into inaccessible areas. Slight warmth or dampness behind a wall might hint at a hidden chamber. I’ve seen colonies tucked behind dishwashers, feeding off food particles and condensation. It’s rarely where you’d expect.
If all else fails, dusting entry points with fluorescent powder and checking with UV light after a few hours can help spot return routes. It’s subtle, but enough to catch hidden movement patterns you’d miss otherwise.
Selecting Targeted Baits Based on Ant Behavior
Start with protein or sugar-based formulas depending on foraging patterns observed within the first 24 hours. Species that trail along kitchen counters or near food waste typically prefer sweets, while those closer to garbage bins or under appliances may lean towards grease or protein.
Don’t rely on a single bait type. Mixing formulations – for example, a gel near the sink and protein granules under baseboards – increases the chance of interaction. Rotate brands occasionally, even with the same active ingredient, to bypass bait aversion some colonies develop over time.
If movement continues after 3–5 days, reassess placement. Baits too close to nesting zones often trigger avoidance. Pull them slightly outward into transit routes. It feels counterintuitive, but you want intercept points, not direct confrontation.
Observation matters more than guesswork. One technician I spoke to swears by lightly dusting areas with flour beforehand – a simple way to reveal foot traffic and adjust bait location accordingly. Not scientific, but surprisingly useful.
And don’t expect immediate results. Some colonies send out scouts that take a few hours, even a day, to return. If the bait disappears too fast, especially overnight, consider that it might be attracting other insects – or rodents. That’s a whole other problem.
Applying Residual Insecticides in Key Infestation Zones
Target baseboards, wall voids, and entry points first. These are the spots where activity tends to spike, especially along kitchen floors, bathroom corners, and behind appliances. A slow-acting, microencapsulated formula sticks better to surfaces and keeps working for weeks. Don’t overspray–light, consistent coverage is more reliable than saturation.
Pay extra attention to electrical outlets, under sinks, and around window frames. If there’s visible movement along a trail, follow it back and treat discreetly just before the entry gap. Avoid spraying directly into food prep areas; use a bait gel nearby instead, then back it up with residual around the perimeter. This two-step approach works surprisingly well, especially if the colony isn’t too deep inside a structural void.
Choose a product suited for the surface. Something labelled for porous materials won’t behave the same on tile as it does on wood or drywall. On concrete, you might notice the residue breaks down faster, so reapplication might be needed sooner than expected. That part’s often overlooked.
After applying, avoid cleaning treated areas too aggressively. Wiping down baseboards with strong cleaners undoes the job completely. If you’re unsure, mark treated spots discreetly so they don’t get scrubbed the next day. It sounds minor, but it makes a real difference.
One caution–don’t rely solely on residuals. They’re great at limiting movement and preventing new activity, but they won’t always reach the source. Combine this with inspection and baiting where trails lead into voids or soil contact areas. It’s not fast, but it sticks.
Sealing Cracks and Gaps to Prevent Future Access
Seal any visible openings with silicone-based caulk, especially around window frames, door thresholds, utility entry points, and foundation lines. Expanding foam can help with larger gaps, but it tends to degrade in harsh weather. Silicone lasts longer and doesn’t shrink as much over time.
Focus on entry zones at ground level–ants rarely scale walls unless there’s a strong food source or a moisture trail. Look for areas where cable lines, gas pipes, or air conditioning tubes penetrate exterior walls. These spots are often overlooked and can be just wide enough for a colony scout to slip through.
In basements and crawl spaces, use weatherproof sealant rated for masonry. If there’s crumbling mortar or loose bricks, fix those first. Temporary patchwork won’t hold up through Calgary’s freeze-thaw cycles. I once thought a bead of latex caulk would do the trick–by spring, the trail was back. Lesson learned.
It helps to map the property. Draw a basic sketch or use your phone to mark where activity is concentrated. That way, you’re not randomly sealing areas but actually blocking routes they’ve used before.
| Location | Sealant Type | Recommended Frequency |
|---|---|---|
| Window frames | Silicone caulk | Every 3–5 years |
| Foundation gaps | Masonry sealant | Annually, after winter |
| Pipe entry points | Expanding foam + caulk | Every 2–3 years |
Don’t trust weather stripping alone. If there’s daylight around your door edges, it’s not sealed–period. Combine mechanical barriers with proper sealing. A sweep on the bottom of the door plus caulk around the trim works better than either alone.
Monitoring Treated Areas for Recurrence and Adjusting Strategy
Check treated zones weekly during the first month. Don’t wait for signs to pile up–one or two scout sightings near baseboards or under sinks can mean the colony’s regrouping. Light dusting of talcum or diatomaceous earth in those areas can help track movement without reintroducing chemical residues.
If activity resumes near a bait point, the formulation might be wrong for the current season. Sugary lures work better early in the year, but later, they may go for protein. Swap out baits, but don’t change locations too fast. Give each adjustment 3–5 days, unless the surge is sudden. Then yes, reassess immediately.
Signs the Plan Needs Tweaking
Fresh frass, wing fragments on windowsills, or foraging lines appearing at night usually point to an internal nest missed during the initial treatment. Thermal imaging can help here, but so can simpler methods–try using a damp paper towel overnight near hotspots. In the morning, look for activity or residue.
If outdoor pressure keeps pushing them back inside, inspect exterior barriers monthly. Seal cracks wider than a dime, and if they’re still coming in, consider treating entry zones again–but rotate active ingredients to avoid tolerance buildup. I’ve seen repeat flare-ups just from reusing the same compound too often.
Making Adjustments That Stick
It’s rarely just one tweak. Some cases need a mix of physical, chemical, and behavioural disruptions. That could mean replacing mulch near foundations, setting up light traps indoors, or even switching bait placements every few feet to mimic natural foraging randomness. Sounds excessive, but sometimes it’s the only way to break the pattern.